Monday, May 30, 2011

Craft Fairs 101 - Part 1


(above: thousands of visitors at Renegade Craft Fair)

As the summer craft fair season gets into full swing, the time seems right to talk about selling your goods in person, and bringing your Etsy magic into the real world. This is part one in a series of three posts about how and why to participate in craft fairs, art and gift shows.

First off, some great reasons to participate in a craft fair:

1. Extra income! Many artisans like to do craft fairs throughout the year to supplement their income, or just as a regular paycheck. Some people even tour the country during the year, participating in large craft fairs many months out of the year.

2. Local exposure! Craft fairs can be a great way to attract local buyers. Even if shoppers don't purchase from you on the day of the fair, many people will grab your business card, and perhaps make a purchase from you at a later date. The added online traffic after the fair can be just as profitable as the sales you make the day of the fair.

3. Additional promotional opportunities! Many bloggers and magazine editors visit craft fairs to discover up-and-coming designers. A feature on a well-read blog or popular magazine can be an invaluable boost to your business.

4. New wholesale accounts! Buyers for many local businesses often come to craft fairs to scout for new merchandise for their stores. This can mean new sources of income, as well as more exposure for your business.

5. Networking with others in your field! Craft fairs are a great place to meet other artists and craftspeople. At a busy fair you can make connections with tons of new people, both customers and potential collaborators and mentors. Perhaps you'll meet a gallery owner who'd like to show your work, or another artisan who you can collaborate with on a new project.


(just a few of the many craft fairs you could participate in!)

While participating in craft fairs can be a bit daunting at first, a little planning can make things much easier. First, do some research about what fairs might attract your target market. It's important to find a fair that will attract both a good number of attendees, and advertise to your target market. You may want to start with craft fairs in your town, but it may pay off to look for larger fairs that you can travel to easily that are a little further away.

Think about how much you'd have to sell to break even, after considering booth fees and setup costs (renting tables, buying display elements, paying for travel, etc.) It can be a bit of an investment to begin doing craft shows, but these added costs can pay off big time if you find a show that is suited to your wares. Be practical about what you can afford for your first fair, and once you've considered all the costs involved, apply to a show! Many craft fairs are juried months in advance, so keep that in mind as you plan for upcoming craft fair seasons.

Next up in this Craft Fairs 101 series: You've been accepted, now to plan your craft fair booth! Lots of tips about how to display your awesome goods, coming soon.

Sunday, May 29, 2011

Images and Inspiration

Ideas can be life-changing. Sometimes all you need to open the door is just one more good idea.
~ Jim Rohn

Wednesday, May 25, 2011

Aspiring Artisan: Laura Johnston

LJ headshot

Tell us a bit about yourself.

I’m Laura Johnston. I'm a passionate, understanding, creative, detail-oriented and open-minded person. I started my photography business while I was still in college and have been working for myself since then (I’m all of 24 now). My first job ever was at a Dunkin Donuts/Baskin Robbins, I am a tomboy at heart, and I love plays on words and witty humor. I have incredibly eclectic tastes in everything except for food. My preferred menu has approximately the variety of a five year old’s. Ha!

The Girl with Kaleidoscope Eyes

Apart from creating things, what do you do?

What... in that small 5% of my time left over? I sleep! Haha. Seriously though, I like to spend time with my wonderful soulmate and our two dogs, Cody & Chloe. I take breaks from my creative ‘jobs’ and do other creative things for fun (play saxophone, make jewelry, draw, craft, write). I also love, love, love exploring and wandering in new places, whether it’s somewhere in town I haven’t been yet or a whole new country.

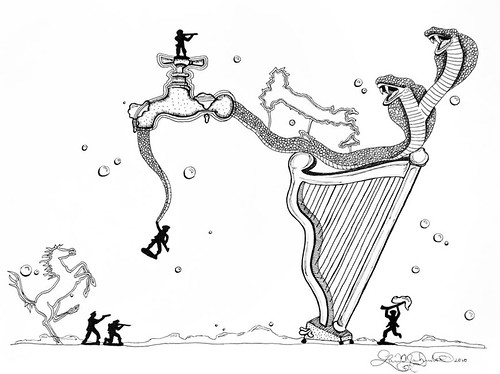
Italian Scoundrels


What first made you want to become an artist?

When I was in first grade I drew an illustration for a book report: a fat little gray elephant in profile, facing left, wearing a bright yellow t-shirt. What book? I don’t remember. The response I got from my classmates and my teachers about the illustration really pushed me to draw more, and from that point I did. I spent soooo much time in classes from first grade all the way through college doodling and drawing. So that’s where it started.

Stem of Consciousness
Please describe your creative process.

For photoshoots with models involved I piece a strong team together, which depending on the concept, will include models, make-up artists, hair stylists, wardrobe stylists, and/or assistants. Sometimes the shoot concept is premeditated, and sometimes I come up with a concept inspired by the model I’m going to be working with. I’m a believer in creating the image in camera versus in photoshop, so I don’t use a lot of frills and fancy actions on my images. Most of my photoshop work involves detail-oriented tweaking that takes the raw image I shot from the camera to a smooth, polished final product.

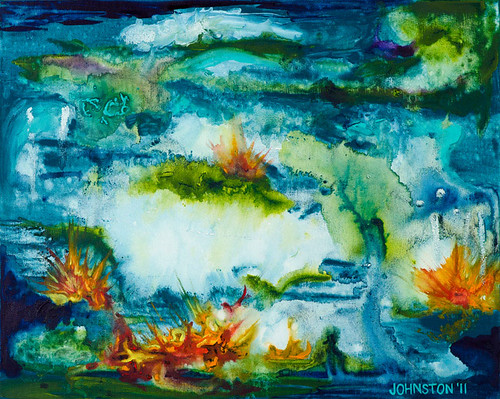
Aquatica
Aquatica Fine Art Print

My creative process for artwork is pretty organic. I typically don’t premeditate anything, but let the medium and the moment guide me. If I’m drawing I start with one subject (even sometimes just a random shape) and just build off of it until it looks and feels like a finished composition. Balance is key. When I paint, I clear the floor and put down a large mat or piece of cardboard and place my canvas on top of it. I’ll have water and paper towels and my paint box handy. Then I just start grabbing colors and mixing the paint with the water and grab more colors dance back and forth with the medium until the composition comes together. Most of my paintings are very driven by color and mood.


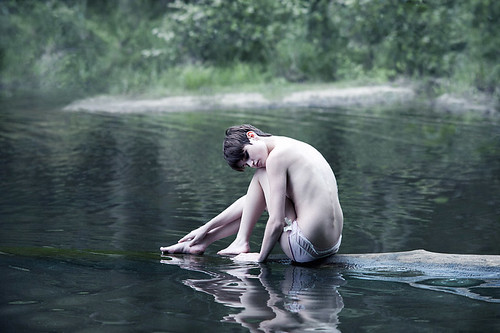
Fleeting Stillness
Fleeting Stillness
Please tell us something about your subject matter, a little background into why you make art about what you do.

Three main interests: people, animals, and nature. I am very interested in psychology and find people fascinating, so I really enjoy portrait work. Our experiences, our emotions, the way the each one of us has a story of our own. Aesthetically, the female form has always been inspiring to me and is a common theme throughout my artwork and photography. I grew up with a brother who had muscular dystrophy and as a result was incredibly thin. I think this has translated to a lot of my figure work (mostly seen in my drawings) and has also spilled over into photography via an interest in working with thin models. Nature has been a solace for me from the time I was young and I still feel so at peace whenever I’m just sitting barefoot in a patch of grass or walking through the woods. It’s always beautiful but sometimes it's completely breathtaking, and I’m lucky when I have a camera to capture those moments. When I don’t, I take a mental picture to use at a later point in paintings or elsewhere. My love of animals is not expressed much through photography (unless you count the millions of photos of my two dogs), but there are often animal subjects in my artwork. I’ve actually recently opened my second Etsy shop, which is dedicated solely to my animal friends!


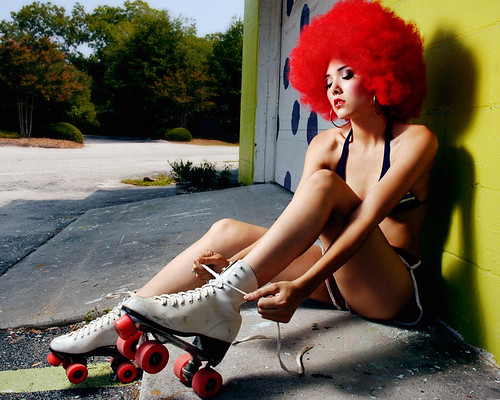
Retro Roller
Retro Roller
What specific steps you are taking to grow your Etsy shop.

Right now I’m focused on expanding my product catalog to include a wider variety of items. I’ve recently added woodblocks, postcards and posters. Coming soon are bookmarks, stickers, coasters and photo jewelry! My hope is to reach a wider audience by providing not only wall art, but functional art as well.


What advice would you give to artists who are new to Etsy?

Be active and involved in the community and keep pushing yourself to move forward, whether it’s with new product, an updated banner, or contacting blogs to feature you. Etsy is a wonderful place, but Etsy doesn't create success for you; you still have to create it for yourself. This quote helps me out sometimes when I’m stuck or afraid of new ideas, “Even if you fall on your face, you’re still moving forward.”


Con Un Pavo
How do you promote your work?

Facebook has been wonderful for me and that’s where I do a lot of my promoting. When I first opened my shop on Etsy I built lots and lots and lots of treasuries to promote my work a little at a time to other Etsians and their friends. I still make lots of treasuries now.

In ten years, where would you like to be?

In ten years I would like to be showing my work in galleries across the globe. I’d love to have a studio with glass walls where I could do amazing natural light studio shots indoors. In my dream studio I could create to my heart’s content, without worrying about messing up the carpet (because there wouldn’t be any) or getting paint on the walls. But besides that and a more steady income, I don’t want ten years from now to be too much different from right now. :)

Visit Laura's Website
Visit Laura's Etsy Shop

Saturday, May 21, 2011

How to Photograph Jewelry

The first time I tried to take pictures of my jewelry to sell on Etsy, I ended up almost in tears. Here I was all ready to start my shop, but I had no clue what I was doing with my camera. I think I tried the classic black velvet background, indoors, with a flash. I ended up with blurry overexposed pictures. The lint on the velvet was the only thing that was clear. My husband mentioned something about macro mode but I didn’t even know what that was. About the only thing I knew for editing was cropping.

So when I volunteered to put this post together, I did so with a warning of “do as I say not as I do”. Now, I am far better at photographing my jewelry than I was when I started, but I know I’m not where I strive to be, or where my top competition already are. I am, however, committed to getting there: I am constantly looking for new tips and new ways to apply what I’ve already learned. Product photography is probably the biggest factor after your product itself, for success online, particularly on Etsy. You’ve all seen those threads on the forums “I know my pics aren’t great yet but what else should I be doing to get more views and sales”. Sorry to say but there is no “else” that will compensate you if your pictures clearly need work. Conversely, uplifting your pictures can help dramatically.


One of the most popular jewelry sellers on Etsy recently changed her backgrounds and re-shot half her shop items. Her pictures are always incredibly well done, and even SHE keeps looking for ways to improve. (If I don’t work just as hard how do I expect to compete?) So for now I look at photography as just another of the many business challenges to conquer! I can’t tell you how many times I’ve thought “Now THIS is the perfect backdrop” - redone half my shop pictures - and two weeks later decide I hate it and do it all again.


I’ve added links to more in-depth articles (at the bottom ) as I don’t pretend to cover everything in one post, but hopefully this will be a good starting point.

My main advice is: Keep changing it up, keep learning, keep trying new things - anyone can get better. If something isn’t getting the attention know you it deserves, try a new picture first. And have fun with it!

I’ll focus (no pun intended) on four main impact factors:

Camera:

I’m not going to recommend anyone drop $1000+ on a DSLR and a nice lens. I plan to one day, but I don’t believe I’m ready to take full advantage of one yet. A nicer camera won’t magically make my pictures look professional. I have resolved to first improve my skills around lighting, composition, and editing before I make this investment. No camera will solve those for things me, so for now I’ll stick with my Nikon S6000. There are some minimum requirements though, and if your camera is not more than a few years old you should have them - I find these the most useful:

Macro lens feature: Once I realized what this was, I can’t imagine ever being able to take a jewelry pic without it. Macro enables you to take clear crisp pictures from 3-10 inches away. You can always crop later, but you want to capture as much detail as you can and macro is the only way to do this.

Light balance: Play around with yours depending on your light source. I have a Nikon which tends to favor blue over red. I take most of my pics outside and I use the “cloudy” setting which compensates with a little extra brightening. My other choices are Daylight, Incandescent (normal indoor lighting), Flourescent, and Flash - the last of these would never apply for me.

Autofocus: - this can be handy. I have mine set to single and I lightly click the button to take a pic and AF kicks in, like a preview for me. There is also Full Time autofocus but this is a quick battery drain.

Your camera may have other tools and settings, so please tinker. Just make a note somewhere when you figure out the optimal settings for you, in case you need to go back to them.


Lighting:

Never Use Flash: It never looks good. Trust me. Floods light and creates shadows all over the place. If you need more lighting flash is not the answer.

Natural Light is Best:

Outdoors: Ok I’m lucky. I live in Florida. I can count on sunny days 5 out of 7 on a bad week. But direct sun...see Flash. If you can setup a nice staging area outside that provides filtered light (my back patio, around 5-6pm when the sun is starting to move behind my house) try that out. Try different times of the day for you to find the best time. If you’re not sure, try the same setup a few different times of the day then look at your pictures. I’d love to take morning shots, but the light outside for me just doesn’t pop as well as early evening.

Indoors: Near a window, near a source of sunlight - this can provide natural softening and filtering to reduce glare but still gives you the benefit of nice natural light. If it’s a bit too bright, lightly tape a piece of tissue paper over the glass to soften the glare. Here’s a blog post from

Indoors: Lightbox. Another investment option though you don’t need a major large setup for jewelry. I have a make-shift one similar to the one you can make here:

http://etsymentors.blogspot.com/2009/11/how-to-use-light-box-and-photo-editing.html

I use a few close-set lamps, with Daylight bulbs, which I find are as close as you can get to simulating natural light.

Composition: I probably futz around with this most often. I’m always looking for new items to drape a pair of earrings over! Pretty scrapbook papers from craft stores are great, books, cups, tiles...ideally something neutral that helps create the mood you want, without distracting from your items.

Main Shot - the Hook Pic:

For the first couple of shots, I want to draw my customer in. I want to show the shine, the details, the color. I’m less worried about the “full body” shot here. I’ll use these garnet earrings as my example.


I have them laid on a glass table outside. Early evening sun creates a light surface for me with some nice sky reflections but not too busy in the background. I then moved myself around the earrings to find the spots where the light hit the stones best. I cropped out most of the earwires in the first shot to maximize the garnet impact for the thumbnail. Remember your buyers are finding you from a long list on the page - your 1” square needs to incite a click. I pull back for the remaining shots, but for the first one I’m trying to get attention to where the shopper wants to see more.

Scale/Size/No really what’s it gonna look like on me:

Pretty drape-y shiny pics only go so far. If I’m gonna put you in a Treasury that’s fine, but if I’m gonna put you in my shopping cart I need a little more reality!

I have a few different “Go To” pictures for my items. I want one to show scale, which is me holding the piece in my hand (do check your fingers and nails and ensure no hangnails, no dirt, etc - the macro lens is very cruel!). I’ve seen other sellers photo the item next to a coin, or a ruler, and these work too. I want at least one “as worn”, that means earrings hanging, necklaces draped as if on a neck, etc. Some choose to show the jewelry on a live model. When it comes to earrings I avoid that, but I know some people like it. Up to you! If you are going to use a model form, try to find an angle that focuses the attention on the jewelry - not the vacant plastic face - am I the only one that finds those a bit creepy?

I hate the way my fingers look in pictures but it’s a good way to imagine size:


For earrings I hang on a small bowl, for necklaces I drape over a slightly larger white porcelain bowl, inverted.


Backgrounds/Staging/Props:

Neutral, natural, light, not too busy....Ok at times I break all the rules but I do try to stick with stone tiles, slate, glass, or barn wood as a background. Unlike other items that can benefit from added color in the staging, jewelry does not need a distraction. Other prop ideas to add depth and scale to your pictures can include shells, candles, books, cups and bowls. Experiment, and be flexible depending on your specific items (i.e. the perfect prop for those Garnet earrings completely washes out the Citrine pair). I have a small collection of stones, tiles, wood, all gathered out on my patio on a glass table.

Here’s my “outdoor photo studio”:


I sometimes like to create a little more drama with a layered background. Here I use a tile on a wood surface and let the earrings drape from one to the other. This pair of Iolite earrings were taken indoors, in my makeshift lightbox.


Editing

I take around 30-40 pictures of an item before I start editing down to the 5 for my listing. I’m getting better at knowing if what I see in the camera will be a good shot to work with. I probably took far longer when I started, but today, those 30 shots take me less than 5 minutes. I usually setup with a dozen items to shoot at a time, and from snapping to editing it’s less than an hour.

There are many tools available for editing, of course the most popular being Photoshop. The PS Elements kit is a cheaper option and works very well for most needs. Free software is also available in Google’s Picasa, Piknik, GIMP, PIXLR, and various others. All of these become easier to use with practice. Some features to concentrate on for jewelry in particular:

Cropping: For Etsy the photos you chose will be square or 4x3 ratio (in gallery or Treasury view). I try to ensure my first picture of the item works for both - I want it to be a nice addition in a Treasury, while also showing enough of the detail in the Square view for a customer. Either way, crop out any junk in the background, and get your size down to a crisp clear item.

Color Balance: I depend on this to compensate for the slight blue tone that Nikon sometimes adds. This feature has saved many of my shots.

Contrast: fill with a little more light, up the highlighting (very important for jewelry) or deeper the saturation if your shot washed out a little.

Focus: I like to soften the edges just a little to apply more focus on my items.

Levels: Now you’re getting technical, and this is a feature not found in most freeware. I’m no expert here but a great guide can be found here in my links below.

Editing can really save your pictures, but be careful. You can edit your way to an amazing picture that looks NOTHING like your actual item, so apply a reality check before you upload!

Lastly, embrace photography - it can be fun. Expect to take and retake item pictures as you perfect techniques and learn new ones. Something you love isn’t selling? Change the picture - I’ve sold things that have sat in my shop for months within hours of uploading a new photo. A new photo is free, and often more effective than renewing. If you find yourself getting frustrated taking photos, take a trip through the “sold” pages of a popular shop, and scroll backwards from their early sales to the present. I’ll bet those earlier shots are far and away from what they have now. Seeing the progress in their photo skills helps remind me that we all start somewhere! What’s important is to keep improving your photography as your most important marketing skill.

Hopefully you found a couple of tips here you can use. For more reading, here are some reference links that I’ve used in the past:

http://smallobjectphotography.blogspot.com/

http://shopsomethingblue.blogspot.com/2010/07/quick-dirty-photo-tutorial.html

http://www.merriweathercouncilblog.com/2011/01/my-etsy-photo-taking-tips-tricks-and.html

http://etsymentors.blogspot.com/2009/11/how-to-use-light-box-and-photo-editing.html


Author: AeridesDesigns

Friday, May 20, 2011

Thank God I Found This - A picnic in the park

Do you long for a picnic in the sun? Here are a few Etsy items to get inspired! And if you are planning a picnic soon, these finds may make you say "Thank God I Found This!"

- Vintage Cotton Halter Dress by aiseirigh, $56
- Summer Evening 8x10 Fine Art Print by aVeryStory, $20
- Melody of Spring Original 9x12 Watercolor Painting by paintedbliss, $65
- Woven Picnic Basket by AMradio, $49
- Vintage Lunch Tin by thepetitemarket, $18
- Picnic Wooden Cutlery, 10 sets by ititems, $7.90
- Eco Square Plates by janeecollings, $8.70

Wednesday, May 18, 2011

And the Winner Is...

Remember the Manly Man Contest discussed a few weeks ago? Well, on the 18th the votes were finally tallied and the results are in.

Here are the amazing final entries

'The Manly Man: AAG Contest Finalists' by tuckooandmoocow


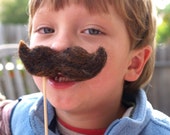
The Earnest Hemingway - Need...
$8.00

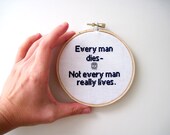
Life and Death Cross Stitch ...
$30.00

Paw Ingalls - A Primitive Fo...
$55.00

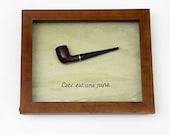
This is a Pipe - Magritte Pa...
$60.00

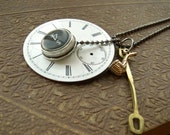
Found Items Ball Chain Neckl...
$45.00

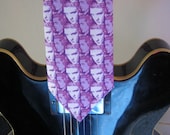
Elvis Tie in purple print
$25.00

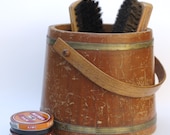
Large Vintage Shoe Shining B...
$20.00

Treasury tool by Red Row Studio.


Before we get to who won the vote, let's take a minute to thank our teammates who have so generously donated prizes to this contest!


The Winner's Choice of Hand Painted Necklace from TuckooandMooCow


A fabulous pink Coffee Mug Cozy from CornFlowerBlueStudio


A $25 gift certificate to LauraJohnston's Etsy Shop


A free print or package of labels from CalamariStudio


and a choice of any item up to a $20 value from MyOliviaJewelry


Runners Up

Tie between

DovieMoon with the Shoe Shining Kit
and PixiePocket with the Elvis Tie


2nd Place

OldWorldPrimitives with "Paw Ingalls"


1st Place
and the Grand Prize

CalamariStudio with "Ceci est une pipe"


Congratulations!


Runners up will have Etsy minis from their shops in the sidebar of this blog for the next 2 weeks. 2nd place will also have an Etsy mini displayed as well as receive a small prize package. 1st place will receive all of the above listed prizes as well as an assortment of handmade and crafting goodies!

Thanks so much to all Aspiring Artisans who entered! You are awesome!