I was supposed to post this yesterday, but I am a little behind. Do you know that feeling? The kind where you feel like a cartoon character who's head is about to explode.
The biggest thing about time management is that you either feel like you are managing it well ... or you don't, and sometimes that feeling can change hour-to-hour.
So, when you see the big red lights flashing in your head it is time to stop and re-group.
Often our lists are long and stressful because of ourselves. The things that actually need to be done that day are short and manageable. If they are not, then we need to be honest about what we are committing ourselves to. So, stop, and really think about what you absolutely need to do today, and make sure eating and sleeping are on that list!
Go through the immediate list and do the things that take the shortest amount of time first. Just getting a few things off of your plate immediately will most likely boost you to get on with the rest of your day.
Now, I'm off to work on my own list ... as my head is screaming "meltdown is rapidly approaching!"

Friday, October 28, 2011
Thursday, October 27, 2011
Crafting Custom Orders
Offering custom orders is a great way to connect with customers and offer something special. People love items that they helped to design and were made just for them. Taking custom work is great for the artist as well. It provides an opportunity to do something creatively different and can often lead to new design inspiration. I have completed several custom orders that have inspired new products.
To make sure the transaction goes smoothly, there are several things to remember when accepting custom work.
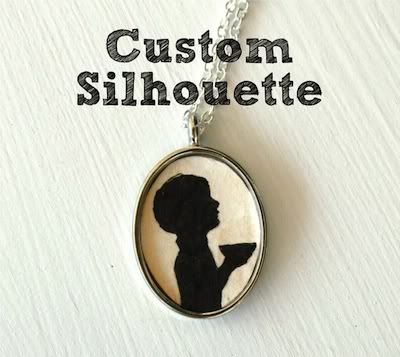
custom silhouette pendant by tuckooandmoocow
To make sure the transaction goes smoothly, there are several things to remember when accepting custom work.

le custom pet by leanimale
Communicate with your customer - Communication is key when taking on a custom piece. Talk to your customer to find exactly what they want. No detail is too small to discuss. You really want to get a clear picture of the client's expectations. It can be easy for two people to interpret things differently, so getting a lot of information is vital when creating a custom piece.
Calculate a price - Realistically consider the time and material cost it will take to complete. It is easy to underestimate how long it will take to create a custom piece. Honestly consider the time it will take to finish; you do not want to undervalue your work. Taking hours longer than anticipated may pressure you to complete the project and you do not want the quality of your work to suffer.
custom silhouette pendant by tuckooandmoocow
Set a date to ship - Take a look at your schedule and set a reasonable date to ship. I often will have to order materials for custom orders, so make sure to consider the time it will take to get supplies. Giving yourself a little extra time is always a good idea and can avoid a stressful situation if something unexpected happens. Make sure to communicate with your customer when to expect their order in the mail. Many people will not realize how long it takes to complete a custom piece. Being up front with the lead-time will avoid any confusion and dissatisfaction.
Create a custom listing - It is a good idea to ask for payment up front, or at least a deposit before investing the time and materials into a custom piece. To create a listing on Etsy without a photo of the finished product, you can create a custom listing. A custom listing image can easily be created using the free photo editing program picnic. Edit an existing product photo by adding text. Include the details of the piece in the listing’s description.
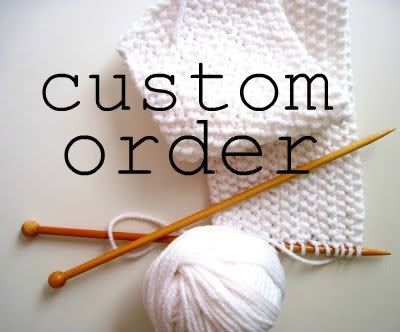
custom order by cornflower blue studio
Take photos– Pictures of the finished product are important for several reasons. Sending photos of the final product for approval is a good idea before shipment. If your client is unhappy or wants changes, it is much easier to remedy the situation before mailing the item out. Pictures of custom items are great to include in your portfolio to showcase a range of work. Also, I have had customers return for a second, similar custom order. It is very handy to have detailed photos so you can create a replica of the original piece.
Tuesday, October 25, 2011
Talking about craft fairs...

For the last year and a half I have been doing lots of craft fairs. Any kind of craft fair you can imagine, the tiny ones (only 5 or 6 artists in a very small place), the big and very well known ones, the new ones, the just started ones, outside, inside, during any season and time of the year, successful ones, crappy ones, you name it! I have even sold in a public square below a mountain in Montreal where people gather on Sundays to play drums and have a lovely day outside and where a bunch of artists and hippies sell their stuff on the ground. After all this I can proudly say I can tell you I have learned a thing or two on this topic and I would love to share it with you.

First of all I would suggest you do your research right. There is a bunch of information you have to consider before doing a craft fair and these are some points I think are important:
1. Is it a well known fair or is it new?
2. What kind of crowd attends this fair?
3. How much is it?
4. Location
5. Indoors or outdoors (both have their complexities)
6. When is it?
1. Is it a well known fair of is it new?
I have done both and even though I have had pleasant surprises with new craft fairs, I have also had bad ones. For example; the location was not as good as promised or no one knew about it so there were no clients at all! A well known craft fair or design fair has gained its reputation over the years by making things right, buy choosing their vendors right, by choosing a good location and a good time to make their event and also by doing a good advertisement of it. A good and successful craft fair will be able to provide you with photos of previous events and you can even ask other artists who participated on it about their experience. Do your research!

2. What kind of crowd attends this craft fair?
This is very important because if you go to an event with the wrong crowd you`ll have no sales. Do you know which kind of people appreciate and buy your work? Age, gender, profession, background, etc...
3. How much is it?
Some craft fairs are less expensive than others. Make a budget that includes the cost of the fair, transportation expenses, your display and your packaging supplies before making a decision to participate. To have a successful event you`ll have to make profit after paying all this previous expenses, so if you have never done a craft fair start with an affordable option so you can have the experience and see how it goes.

4. Location
For people like me with no car and living in a city where taxis are super expensive this is very important. I usually pack everything on a big (rather huge) suitcase and go like a gypsy carrying this and another big bag on the metro and buses, not the most gracious way to go around but I deal with it and save myself some money, sometimes one of my friends would be super kind with me and drive me to the fair (and I would be so happy when that happens). If you have a car (lucky you) check the parking options beforehand, you don`t want to be going around for 30 min. looking for a parking place when you have to set up your table by 11am!!! Location is also a good indicator of what kind of crowd will attend. Check if there is an ATM nearby, must of the times only cash is accepted in this events and sometimes clients don`t have enough so this could help your sales.

5. Indoors or outdoors (both have their complexities)
I usually prefer indoor fairs because I don`t have to deal with rain or wind (I`ve found myself hanging from a tent trying to stop it from flying away!) This also depends on your work. In both cases make sure what is going to be provided to you: table (check the size), chairs, a tent (for an out door event), wall space, rack space, electricity, etc... In my case I try to get wall space to display my cards hanging from a thread but in some places you cannot nail things on the wall so take this in consideration).

6. When is it?
There are craft fairs all year long. Best ones of course happen at the end of the year due to all the gift giving frenzy, but depending where you live, there are some other times of the year that are excellent or maybe not that good for doing a craft fair. For example, here in Montreal everyone goes out for the summer and I discover this while having 3 very bad craft fairs last summer. I just could not understand why I was not selling at all until someone explained this fact to me so now I will not do summer fairs.
Once you have decided to participate in a craft fair you have to plan many things. What are you going to sell, do you have stock or you need to prepare for it?, how are you going to display your work?, price tags, packaging, business cards, etc... I always take some tools to repair any of my dolls or jewelry in case something happens to them and I make sure to have enough change. Remember, you are going to be there for many hours so the least you want to be is hungry, bored or uncomfortable, take water, a yummy lunch and a book or whatever you can do while being there that will entertain you. Oh oh oh and do charge your cell phone before going, you want to be able to make a call in case... well, in case you need to!
In my opinion craft fairs are an excellent opportunity to show your work in a different way and to meet your clientele in person. It makes me happy to see the smiles of people faces when they see my work and I have met wonderful people and even made some good friends doing craft fairs. Even in the events where I have had very little profit I have gained something or learned something so I have never had regrets. Some of the retailers that sale my work have met me in a craft fair and some of the customers that knew me in a craft fair have looked for me later on to buy a doll or something. You never know!!!

My last advice would be to attend a craft fair yourself, specially one that you would like to participate as a vendor. Go and spend some time there, look at the crowd and get some ideas for your display from other vendors, ask questions, get the feeling of it! This will give you a very good perspective of the event itself and then you can go ahead and try it!
Good luck!!!
Photos: Alícia Roselló
Na, na, na, na, na, na, na, na, BatGirl! - Treasured Finds

Watercolor Fashion Illustration by Jessica Durrant
Bat Stockings by tattoo socks
Leather Belt by Veronica Vartic
Batty Porcelain Necklace by Petrillo Pottery
Leather Mask by Tom Banwell
For more batgirl themed halloween ideas click here.
Thank you to My Olivia Jewelry for these Treasured Finds!
Monday, October 24, 2011
Business Tip of the Week :: Focus on Creativity

Focusing on creativity is an vital part of running a successful handmade business and learning to direct your creative energy is an important skill for artistic entrepreneurs to develop. Here are my top 3 tips for expanding and focusing your creativity:
1. Develop a creative mindset. Know that you are creative, unique, and passionate about what you do!
2. Create every day. Even if you're tired or grumpy. Grab your sketchbook and draw a picture of your pet, add a few stitches to the scarf you're knitting, take some photographs - whatever gets your creative juices flowing.
Friday, October 21, 2011
Time Management - Keeping up with Future ideas and projects
The most wonderful time of year is approaching! Rather quickly I must say!
This is the time of year when long hours of caffeine induced work sessions are upon handcrafters and artists. We are busy making things and filling orders while trying to maintaining home lives and get some sleep once in a while. However, for some of us this can also be a time of great inspiration. When those creative juices are flowing we can come up with copious amounts of new ideas and projects we would like to do in the future.
It is good practice to have a notebook or a place on your calendar to keep up with these free flowing ideas so that they don't get lost in your brain once the holidays are over.
If you keep a notebook, try to have a notebook specifically for ideas and future projects. When you jot down ideas in a notebook that also serves daily to do lists, orders, and notes the ideas get lost amongst the pages and it may take a long time to find them. Having a designated book for ideas and future projects can be good to reference when you are feeling uninspired. Try to make a list of materials needed for each idea also, so that when you are short on cash for new supplies, you can quickly see what projects you can complete with the materials you have on hand. Also, if the idea is holiday specific make notes of what time of year the project needs to be started and listed for sale so that you have some sort of plan for getting that idea off of paper and into salable form.
If you prefer to keep them on a calendar of sorts look for a generic calendar or even an outdated calendar that you can use for this specific purpose. The calendar may not be useful to figure out what day it is, but months are not going to change anytime soon and it can help to schedule out when to start projects and when to introduce new products to your customers.
I personally prefer the calendar method over the notebook method simply because I can go ahead and organize my ideas when they pop into my head with out worrying about pages in a notebook. I can also see months where I don't have new things scheduled and arrange things so that I am working on new ideas throughout the year.
It can also be helpful to remember that just because snowmen aren't prominent in August, you may choose to work on them then because you have an unrealistic amount of projects scheduled for other months already.
Tuesday, October 18, 2011
Etsy success - How can I make this my full time job?
How do you become successful on Etsy?
How can I make my craft my full time job?
How can I make my craft my full time job?
I get asked these question ALL the time.
So I thought I would share a couple pieces of advice.
1. QUIT!
So I thought I would share a couple pieces of advice.
1. QUIT!
You have to quit what else you are doing full time. If this is what you really want to do, you need to take the plunge. You need to make your craft your number one priority. I know it's a risk, but that is what fuels being an entrepreneur.
2. COMMITMENT.
2. COMMITMENT.
Quitting your day job and plunging takes commitment. You WILL sacrifice your time. You WILL sacrifice your freedom. But...you get to do what you love. Just remember, it takes time to build a business.
3. SUPPORT.
3. SUPPORT.
SURROUND yourself with supportive people. Here on Etsy, find a team, find a place you can go to ask questions...a place to vent...a place for feedback...a place to celebrate your wins. The people I have met on Etsy through my teams have become some of my very best friends. I rely on them...and they on me. It's a give / take relationship.
4. WORK IT!
4. WORK IT!
Retake your photos. Work on your tags. Rewrite your descriptions. Never think you can just remain static.
5. BE SOCIAL.
5. BE SOCIAL.
Social media. Find a place you are comfortable spreading the good news about your items. Do you love Twitter? Develop relationships there first and then share your items. Do you love Facebook? Make a fan page and let them fall in love with you! Do you like to write? Then blog your passion.
6. CREATE.
6. CREATE.
You have to spend time fueling your passion and making new items, or you will grow stagnant and your followers will grow bored. Take time each day to sketch, plan and make! Just do SOMETHING!
Those are just a few of the tips I offer people when I'm asked. The biggest mistake I see is people thinking those that have made it, or those that are successful just got lucky. Pshaw!
It.Takes.Work.
But being in business for yourself and doing what you love? PRICELESS!
and never forget...
Those are just a few of the tips I offer people when I'm asked. The biggest mistake I see is people thinking those that have made it, or those that are successful just got lucky. Pshaw!
It.Takes.Work.
But being in business for yourself and doing what you love? PRICELESS!
and never forget...
BE creative!
~ lisa

A Traditional Hunt - Treasured Finds

Horses and Hounds Riding Dress Print by Janet Hill
Green Faceted Necklace by That Old Blue House
Orange Fox Den Wooden Shadow Box by add Fauna
Organic Thyme at Cubit's
More on this theme here.
Thank you to junkyard glitter for these Treasured Finds!
Monday, October 17, 2011
Business Tips!

This week's business tip is to stay on top of trends and pay attention to what is new in the handmade marketplace. But how do you do that? Here are my top three tips:
1. Spend just a few minutes clicking through popular hubs like craftzine, design for mankind, craftsy, and imaginative bloom on a regular basis. You'll be able to spot a lot of seasonal trends and hot projects without investing a ton of time.
2. Check out Pantone's seasonal color reports to get a jump on color trends. Here are links to the Fall 2011 and Spring 2012 reports.
3. Don't forget about the Etsy Merchandising Desk's monthly list of trends and mainstays. Here is a link for October. Use the recommended keywords in your titles, descriptions and tags to make sure your items are found!
Expand Your Income - Teach Art Classes!
As most full-time artists would agree, earning an income that provides for more than Ramen Noodles and bargain buys can often be a difficult task. It requires ingenuity, dedication, and a willingness to undertake almost any paying, art-related job that presents itself.  After our first class, we quickly began to rethink the sanity of such a decision. We agreed that if we could only survive the summer, we would find a different manner in which to procure a profit. Much to our surprise, however, by the end of the camp, our teaching skills had improved a remarkable amount, and we were not only enjoying our classes but also beginning to make an acceptable income.

During the past three years of working with my husband as self-employed artists, I have certainly experienced a number of fine art occupations. From craft fairs to company retreats, we have tried nearly every opportunity that has arisen. Some of them were abysmally depressing failures, some were break-even disappointments, and some were actually satisfyingly successful. In fact, one of our most profitable endeavors has been to teach kid's art classes (As you can see, I've included a few pictures of some of our most recent projects.)
I will freely admit that the idea of teaching art to a room full of excited children was more than a bit intimidating at first. After all, artists are universally known for being awesome at art and quite a bit less awesome at activities such as explaining, teaching, and socializing.
Fortunately, though, the unsavory reality of power bills, flat tires, and a desire to eat something other than Ramen has an uncanny way of convincing one to step out of the much loved comfort zone. Figuring that if we took one step out of our comfort zone, we might as well take a leap, my husband and I decided to begin our teaching careers by hosting a summer camp for children in kindergarten through sixth grade.
After our first class, we quickly began to rethink the sanity of such a decision. We agreed that if we could only survive the summer, we would find a different manner in which to procure a profit. Much to our surprise, however, by the end of the camp, our teaching skills had improved a remarkable amount, and we were not only enjoying our classes but also beginning to make an acceptable income. Since that first summer camp, we now teach after-school art at two local elementary schools, host a couple of art classes at our studio, and participate in two summer camps aside from our own. Needless to say, it's been a wonderful route for us and has greatly helped to stabilize our business by providing a relatively predictable source of income. So, if you are interested in teaching your own art classes, here are some ideas and tips to help you get started.

Decide who you are going to teach. At first, we
tried teaching adult art classes but discovered that their attendance was much less predictable than that of school-aged children. Kids tend to adopt a weekly routine of extracurricular activities during the school year, and we found kid's classes to be a more reliable income.Decide what you are going to teach. Although our specialty is ceramics, we teach a variety of different types of art in our classes. Our projects range from illustrating a cartoon to making paper mache Halloween masks to building a miniature Christmas village. Using a variety of mediums seems to keep the kids more interested and appeals to a wider audience.
Choose a location. Thankfully, we have a studio where we began and continue to teach our classes. However, if you don't have that luxury, consider a less conventional approach. For example, we teach two of our classes at local schools. In return for using their facilities, we provide free, monthly art classes to some of their students or paint a mural for them at no charge.
Make a plan. At the beginning of each semester, we plan all of the projects that we will create during that semester. Of course, these projects may change slightly as the year progress, but having a general outline enables us to make a list of supplies and order them all at once. Being able to order supplies in bulk usually provides quantity and shipping discounts, which help to decrease class expenses.
Create a fun environment. In our experience, if students are having fun, they obviously want to keep coming to class, and they also tend to learn more and perform better. To help keep a fun atmosphere in our classes, we award random prizes like candy and slappy hands, provide snacks and drinks that the kids can purchase, and listen to upbeat music.
Advertise. As most of us know, you must advertise in order to gain customers, or in this case students. Methods differ depending on your situation. Since we live in a small town, our most effective advertising strategy has been a combination of word-of-mouth and sending flyers to the local schools in our area. We send enough for them to give one to each student, which can sometimes mean that we print around two-thousand pages. However, the cost of paper and ink is quickly recouped by gaining only a handful of students.
Keep track of your finances. From a business standpoint, it's crucially important to keep an accurate record of student payment and class expenses. Remember to take note of when and how much students pay, as well as how much you spend on supplies, power bills, studio rental, insurance, and other class-related expenses.
Tuesday, October 11, 2011
Add Some Mustard - Treasured Finds

Bow Necklace by Cornflower Blue Studio
Bloom Print by Cathy McMurray
Travel Bag at Salvage Life Vintage
A Little Peacock Print by deka- Animals
You can see more mustard themed items here.
Thank you to The Angry Weather for these treasured finds!
Wednesday, October 5, 2011
Time Management - Creating time
I hear all of you workaholics ... working away at a job that you love. Everyone tells you that you are lucky because you get to do something that you love, and something that makes you happy. It is a good thing, a special thing, something that seems so rare in today's world.
 However, there is an ugly side to doing a job that you love. You sometimes work too late, you know that you should stop and spend time with husbands, children, family and friends, but there is just soooooooo much work to be done.
Now, if there is one thing that I have learned doing a job that I love, it is that there will ALWAYS be something to do tomorrow. Your list of things that needs to be done never ends. You have a new idea to be created, a new creation to write down, a hundred unfinished projects in the wings, and never enough hours in a day to get them done.
There is also another thing that I have learned. You NEVER get another today. Kids grow up too fast, you only get so many days in a year to tell your partner or spouse that you love them, and friendships need time and attention.
Unfortunately there is not a magic recipe on how to add any more than 24 hours to a day. The only thing that you can to is make sure that you spend time doing what you love, spend time with the people that you love, and give each the undivided attention that they deserve.
However, in the process of doing this you also need to make sure that you are taking care of yourself! Proper sleep, eating, and exercise will go a long way in making sure that you have the energy to do all the things that you want to do and also prevent getting sick.
Many people call this balance. I can tell you that I don't always achieve balance every day. I still have days where I work too much, but I also make sure that I have days where I spend plenty of time laughing and having fun with the people around me.
Remember to make time for the other things in your life besides work!
Tuesday, October 4, 2011
Treasures from grandma's drawer - Treasured Finds

Cabinet at Sadie Olive
Felt Pumpkins by Fairyfolk
Earrings by A.F. Orfebre
Discover more beautiful items from grandma's drawer here.
Thank you IDNi - Textile Jewelry for these treasured finds.
Subscribe to:
Posts (Atom)